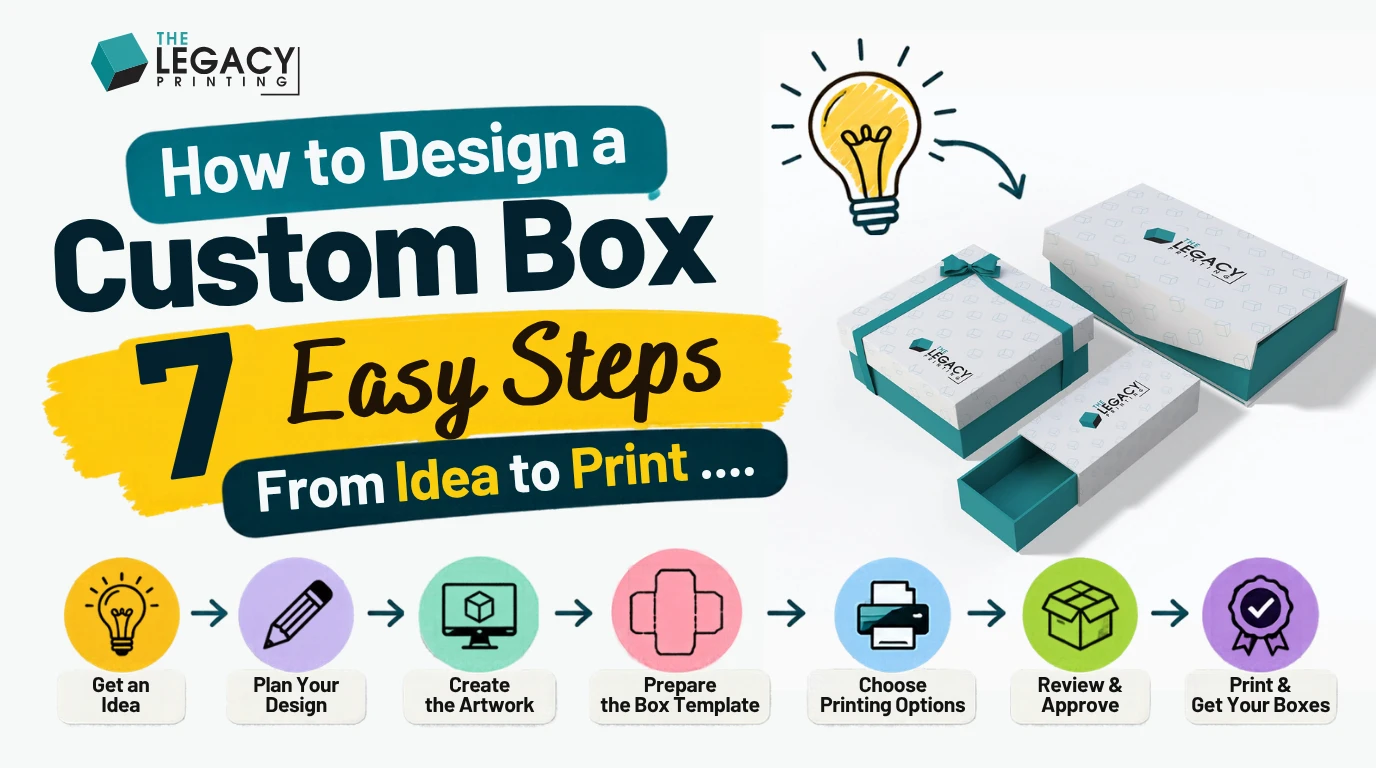
How do you design a custom box? You measure your product and pick a box style. Then you get a flat template called a dieline, place your artwork on it, and approve a proof before anything prints. Learning how to design a custom box is mostly about doing those steps in the right order. That way, you catch a small mistake on screen, not on a whole run of printed boxes.
Every packaging term below comes with a plain explanation. If you'd rather skip design software, our team at The Legacy Printing can build the artwork for you for free.
How to Design a Custom Box: The Quick Answer
Seven steps take you from idea to printed box. The table shows what each step needs and what you get from it.
| Step | What you need | Time it takes | Result |
|---|---|---|---|
| 1. Write a brief | Your product, customer and budget | Quick | A clear goal for the box |
| 2. Pick style and material | Where the box is sold or shipped | Quick | Box type and board chosen |
| 3. Measure your product | A ruler or calipers | Quick | Internal box size |
| 4. Get the dieline | Your printer | Depends on your printer | A flat template to design on |
| 5. Design the artwork | Logo, brand colors, text | The longest step | Artwork on every panel |
| 6. Set up print files | A preflight checklist | Short | A print-ready PDF or AI file |
| 7. Proof and order | Your approval | Depends on revisions | Boxes in production |
How the 7 steps match our 4-step process
At The Legacy Printing, the same work fits into four steps. You choose the style and dimensions (steps 2 and 3). You send your artwork or have it designed free (steps 4 to 6). You approve a digital 3D rendering (step 7). Then we ship your boxes free anywhere in the USA.
Our in-house team prepares the dieline and the print-ready files. So the fiddly technical steps aren't on your plate.
How Does a Flat Sheet Turn Into Your Box?
Every box starts as a flat printed sheet of board. Once you see what happens to that sheet, the design rules in this article stop feeling random.
First, the printer puts your artwork on the sheet. Next, a cutting die cuts out the box shape, a lot like a cookie cutter. It also presses crease lines where the board will fold. Finally, the box is folded and glued at a small flap.
Machines are precise, but the cut can still shift a tiny bit. That's why designers run color past the edge. It works like painting past a strip of tape: when the tape comes off, the edge is clean. Text stays away from folds for a similar reason. Ink on a bend can crack or wrap onto the wrong panel.
What to Remember Before You Print
The 7 Steps From Idea to Print
Do these in order. Each step builds on the one before it, so skipping ahead usually means redoing work.
Step 1: Write a simple packaging brief
A brief is a short note about what the box has to do. A lot of advice on how to design product packaging starts with colors. But a box has a job to do before it's a picture, so answer these questions first:
- What's the product? Its size, its weight, and whether it's fragile, greasy or heavy.
- Who buys it? A luxury gift buyer expects something different from a busy coffee shopper.
- Where does the box live? On a store shelf, inside a shipping carton, or handed over as a gift.
- How many do you need? Our minimum order is as low as 50 pieces. That's handy when you're testing a new product line.
Add your budget too. We don't list prices in articles, but the cost drivers are easy to name. They are quantity, box size, material, number of finishes and print method. Your budget tells you which of those to spend on. For a real number, ask for an instant quote.
Step 2: Choose the box style and material
Pick the style based on how the box gets used. Then pick the board that protects the product.
| Product | Good box style | Why it works |
|---|---|---|
| Lipstick, serum, skincare | Tuck end or reverse tuck end | Light, easy to open, stacks neatly on shelves |
| Apparel, subscription orders | Mailer box | Strong enough to ship and opens like a gift |
| Jewelry, luxury gift sets | Two-piece rigid or magnetic closure | Thick board feels premium in the hand |
| Board games and puzzles (a custom game box) | Two-piece rigid | The lid lifts off and the base holds pieces |
| Bakery treats | Window or gable box | Shows the food; a gable box has a carry handle |
| Candles and soap | Tuck end with insert, or sleeve | Holds the item steady and shows off the label |
| Small favors and samples | Pillow box | Simple, cute shape for light items |
You have four main materials. Kraft is natural brown paperboard with an earthy look. White cardboard makes bright colors pop. Rigid board is thick and sturdy, so it suits premium items. Corrugated board has a wavy middle layer called a flute, which adds strength for shipping.
Kraft paper and recycled cardboard are available in almost every category at no extra premium. Browse our eco-friendly boxes if a natural look fits your brand. Selling in stores? Our custom retail boxes page shows styles that work well on a shelf.
Step 3: Measure your product for the right custom box dimensions
Measure the length, width and height of your largest product. Then work out the inside size with this formula:
Internal box size = largest product size + padding space + insert or accessory space
Always order by internal dimensions, which means the space inside the box. The outside measurement is bigger because the board has thickness. It's like buying gloves: your hand size matters, not the size of the outside of the glove.
Too tight, and the product won't slide in. Too loose, and it rattles and can break. Planning a card insert, tissue or a thank-you note? Leave room for it. Our guide on how to measure a product for a custom box covers tricky shapes. A sample is the surest way to check the fit before a full run.
Step 4: Get your dieline (and learn what it shows)
A dieline is a flat drawing of your box before it's folded. It shows where the box gets cut, folded and glued. Your artwork sits on it, much like furniture on a floor plan.
- Cut line (trim line): where the machine cuts the box out of the sheet.
- Fold line (crease): where the board bends to form a panel.
- Glue tab: a small flap that gets glued to hold the box shape.
- Bleed: extra color past the cut line, so no thin white edges show if the cut shifts.
- Safe zone: an inside margin for text and logos, so nothing gets cut off or lost in a fold.
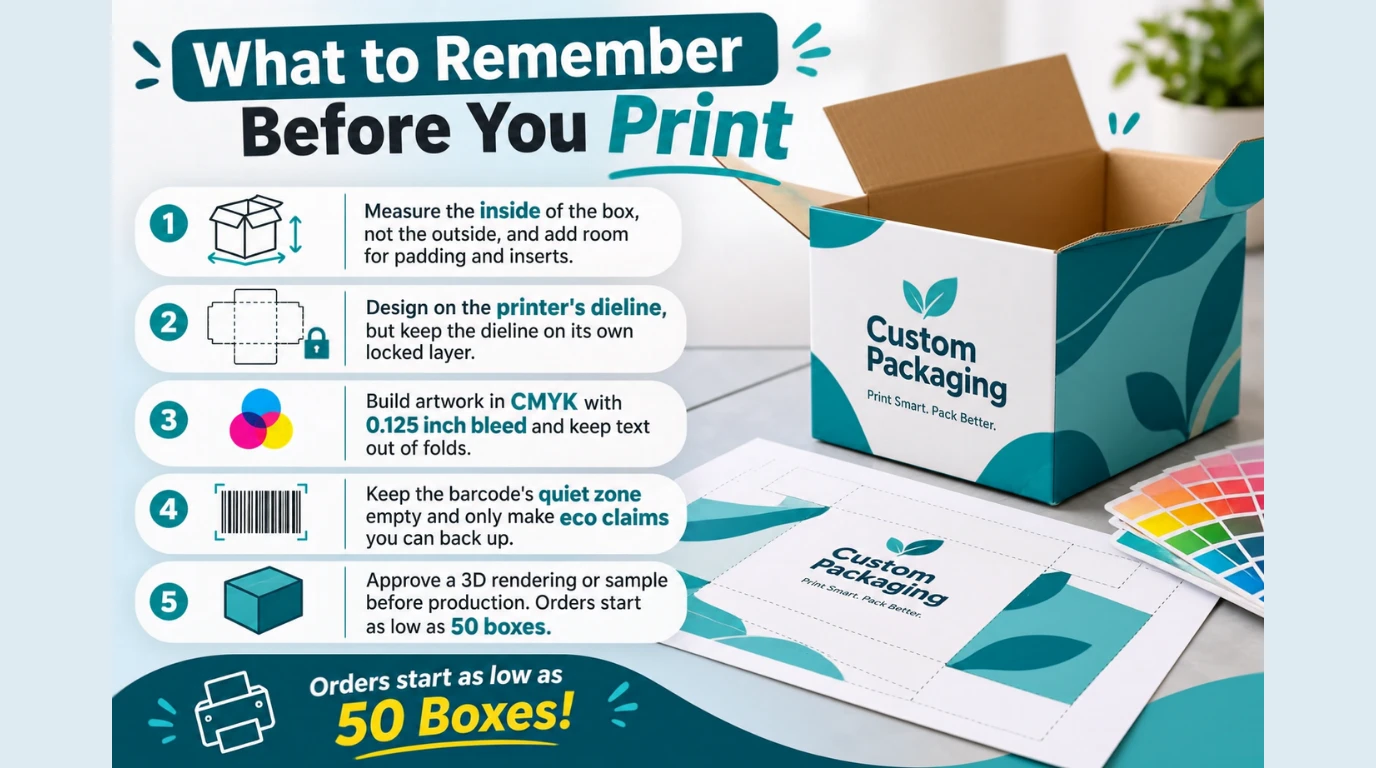
Keep the dieline on its own top layer and lock it. Never design on that layer. Many printers want it hidden or removed in the final file, so check their rule. For more, read what a dieline is and how it's used. When you order with us, our design team prepares the dieline for your exact size at no cost.
Step 5: Design the artwork panel by panel
Give each panel one job, and start with the front. Good custom box design has a clear order of importance, which designers call hierarchy:
- Front panel: logo and product name, readable from a few steps away.
- Side panels: scent, flavor, size or a short benefit line.
- Back panel: barcode, ingredients, directions and contact details.
- Bottom, flaps and inside: easy to forget, and great spots for a small surprise.
Use your brand colors the same way on every panel. If a color must match exactly every time, use Pantone. Pantone colors are ready-mixed inks with set codes, like paint chip numbers at a hardware store.
Put each finish on its own layer in your file, because the printer applies each one separately:
- Matte or gloss coating: matte looks soft and flat; gloss looks shiny.
- Spot UV: a shiny coat on just one part of the box, such as your logo.
- Foil: gold, silver or holographic metal-look color.
- Embossing and debossing: embossing raises a shape; debossing presses it in.
Our honest opinion: one or two finishes usually look classier than five. A gold foil logo on a matte box often beats spot UV, foil and embossing all fighting for attention.
Step 6: Set up print-ready files (box artwork setup)
Box artwork setup is the final cleanup that makes your file printable. Check each item before you send anything:
- CMYK color mode from the start. CMYK stands for the four printing inks: cyan, magenta, yellow and black. RGB is screen color made with light, and it can look different on paper. Don't build in RGB and convert at the end.
- Bleed on every side. A common standard is 0.125 inch (3 mm) of bleed. Stretch backgrounds all the way into it.
- Safe zone. A common rule is to keep text and logos at least 1/8 inch (3 mm) inside cut and fold lines. Heavier boards may need more, so ask your printer.
- 300 DPI images. DPI means dots per inch. More dots give a sharper picture.
- Vector logo. Vector files (AI, EPS, PDF) stay sharp at any size. Raster files (JPG, PNG) are made of pixels and blur when enlarged.
- Outlined fonts. This turns text into shapes, so the printer doesn't need your font file.
- Pantone names kept if you need an exact color match.
- Rich black for big dark areas. This black uses several inks, so it looks deep and even. Ask your printer for their preferred mix.
- File format: PDF, AI or EPS, with vector preferred.
Digital or offset? Digital printing needs no plate setup, so it suits low quantities. Offset printing suits large runs with CMYK color. If you need a custom digitally printed box manufacturer for a short run, digital is usually the easy fit. Big repeat orders tend to move to offset.
Barcodes. Retail products in the US often carry a UPC-A barcode, which follows GS1 rules. Every barcode needs a quiet zone, the empty space on each side that scanners need. It's like the blank margin around a road sign. A UPC-A needs a quiet zone of 9 modules on both sides, and no art may enter it (GS1 General Specifications). The code itself can be printed between 80% and 200% of its standard size, according to the GS1 barcode guide for designers and packagers. Put it on a flat panel, never across a fold.
Eco claims. Be careful with the word "recyclable." The FTC Green Guides summary says to qualify that claim when recycling facilities aren't available to at least 60 percent of consumers or communities where the product is sold. Recycled-content claims need qualifying too, for example with the percentage. An FSC label is different. It covers responsible sourcing of the paper, not recyclability. The How2Recycle label is a voluntary system that tells shoppers how to recycle each part of a package.
Your files and privacy. Only upload logos, photos and artwork you own or have the rights to use. Remove customer names, addresses and other personal details before you send files.
Step 7: Approve the proof, test a sample, then order
Never skip the proof. A proof is a picture of your finished box, or a real sample, that you check before production starts.
With us, you get a digital 3D rendering first. Turn it around in your head and read every panel. Is the logo upright when the lid opens? Does the barcode sit on a flat side?
Want to touch real board first? Request a sample kit in 1 color, 2 colors, 4 colors (CMYK) or custom Pantone. We follow up on kit requests within 2 hours, and kits ship within days. Once you approve, we make your order in-house with no subcontracting. There are no die and plate charges, and shipping is free anywhere in the USA. Request your free quote whenever you're ready.
Should You Design the Box Yourself or Use a Free Design Team?
If you're comfortable with design software, doing it yourself gives you full control. If you're not, a free design team takes the file risk off your hands.
| Option | Skill needed | Control | Risk of file errors | Best for |
|---|---|---|---|---|
| Free design team (ours) | None | High, through revisions | Low: we prepare print-ready files | First-time buyers and busy owners |
| Online design tool | Low | Medium | Medium | Simple layouts on standard sizes |
| Canva | Low to medium | Medium | Medium: watch color mode and bleed | Owners who already use it |
| Adobe Illustrator | High | Full | Low if you know print setup | Designers and brands with in-house staff |
Many owners want to design custom packaging boxes online with a drag-and-drop tool. That works fine for simple boxes. Packaging design for beginners usually gets hard at file setup, where bleed, CMYK and folds trip people up. You can also send us a rough sketch or a phone photo of your idea, and our team will turn it into print-ready artwork.
Custom Box Design Ideas by Industry
The right design depends on what's inside. Here are starting points for some industries we work with.
Bakery and food
Window boxes let the food do the selling, and gable boxes are easy to carry. Leave clear space for ingredients and net weight. For materials that touch food, ask our team which options suit your product.
Cosmetics and eyelash boxes
Beauty buyers notice small details, so finishes matter here. Planning to design an eyelash box? A custom eyelash box is small, so keep the front to your logo and the lash style name. A window can show off the lashes. A custom paper lash box in kraft or white board with a foil logo looks neat without much ink. You can design an eyelash box online with your own tool, or send us your logo and we'll set up the file.
CBD and cannabis
Rules come first here. Our cannabis packaging includes child-resistant closures and space for state-specific labels. Plan your artwork around those areas instead of squeezing them in at the end.
E-commerce and subscription boxes
Mailer boxes in corrugated board protect products in transit. The plain outside can carry a simple logo, while inside printing gives customers a surprise when they open the lid.
Frequently Asked Questions
What size should my custom box be?
Start with the inside size. Take your largest product's measurements, then add room for padding and any inserts. If you're unsure, our team can suggest a size.
Do I need design software to design a custom box?
No. Our free design support covers the artwork, and we prepare print-ready files for you. A sketch or a photo of your idea is enough to start.
What file format should I send?
PDF, AI or EPS work best, with vector artwork preferred. Use CMYK color, 300 DPI images and outlined fonts.
How many boxes do I have to order?
Our minimum order is as low as 50 pieces. Digital printing suits small runs like that, and offset suits large ones.
Can I print "recyclable" on my box?
Only if you can back it up. The FTC Green Guides say to qualify that claim when recycling isn't available to at least 60 percent of consumers where you sell.
Ready to Design Your Box?
You don't have to get every step right on your own. Tell us what you're shipping and how many you need. We'll suggest a box, material and finish, then send a free 3D rendering before anything prints. Get a free quote, or call 800 719 2780 for free design help.